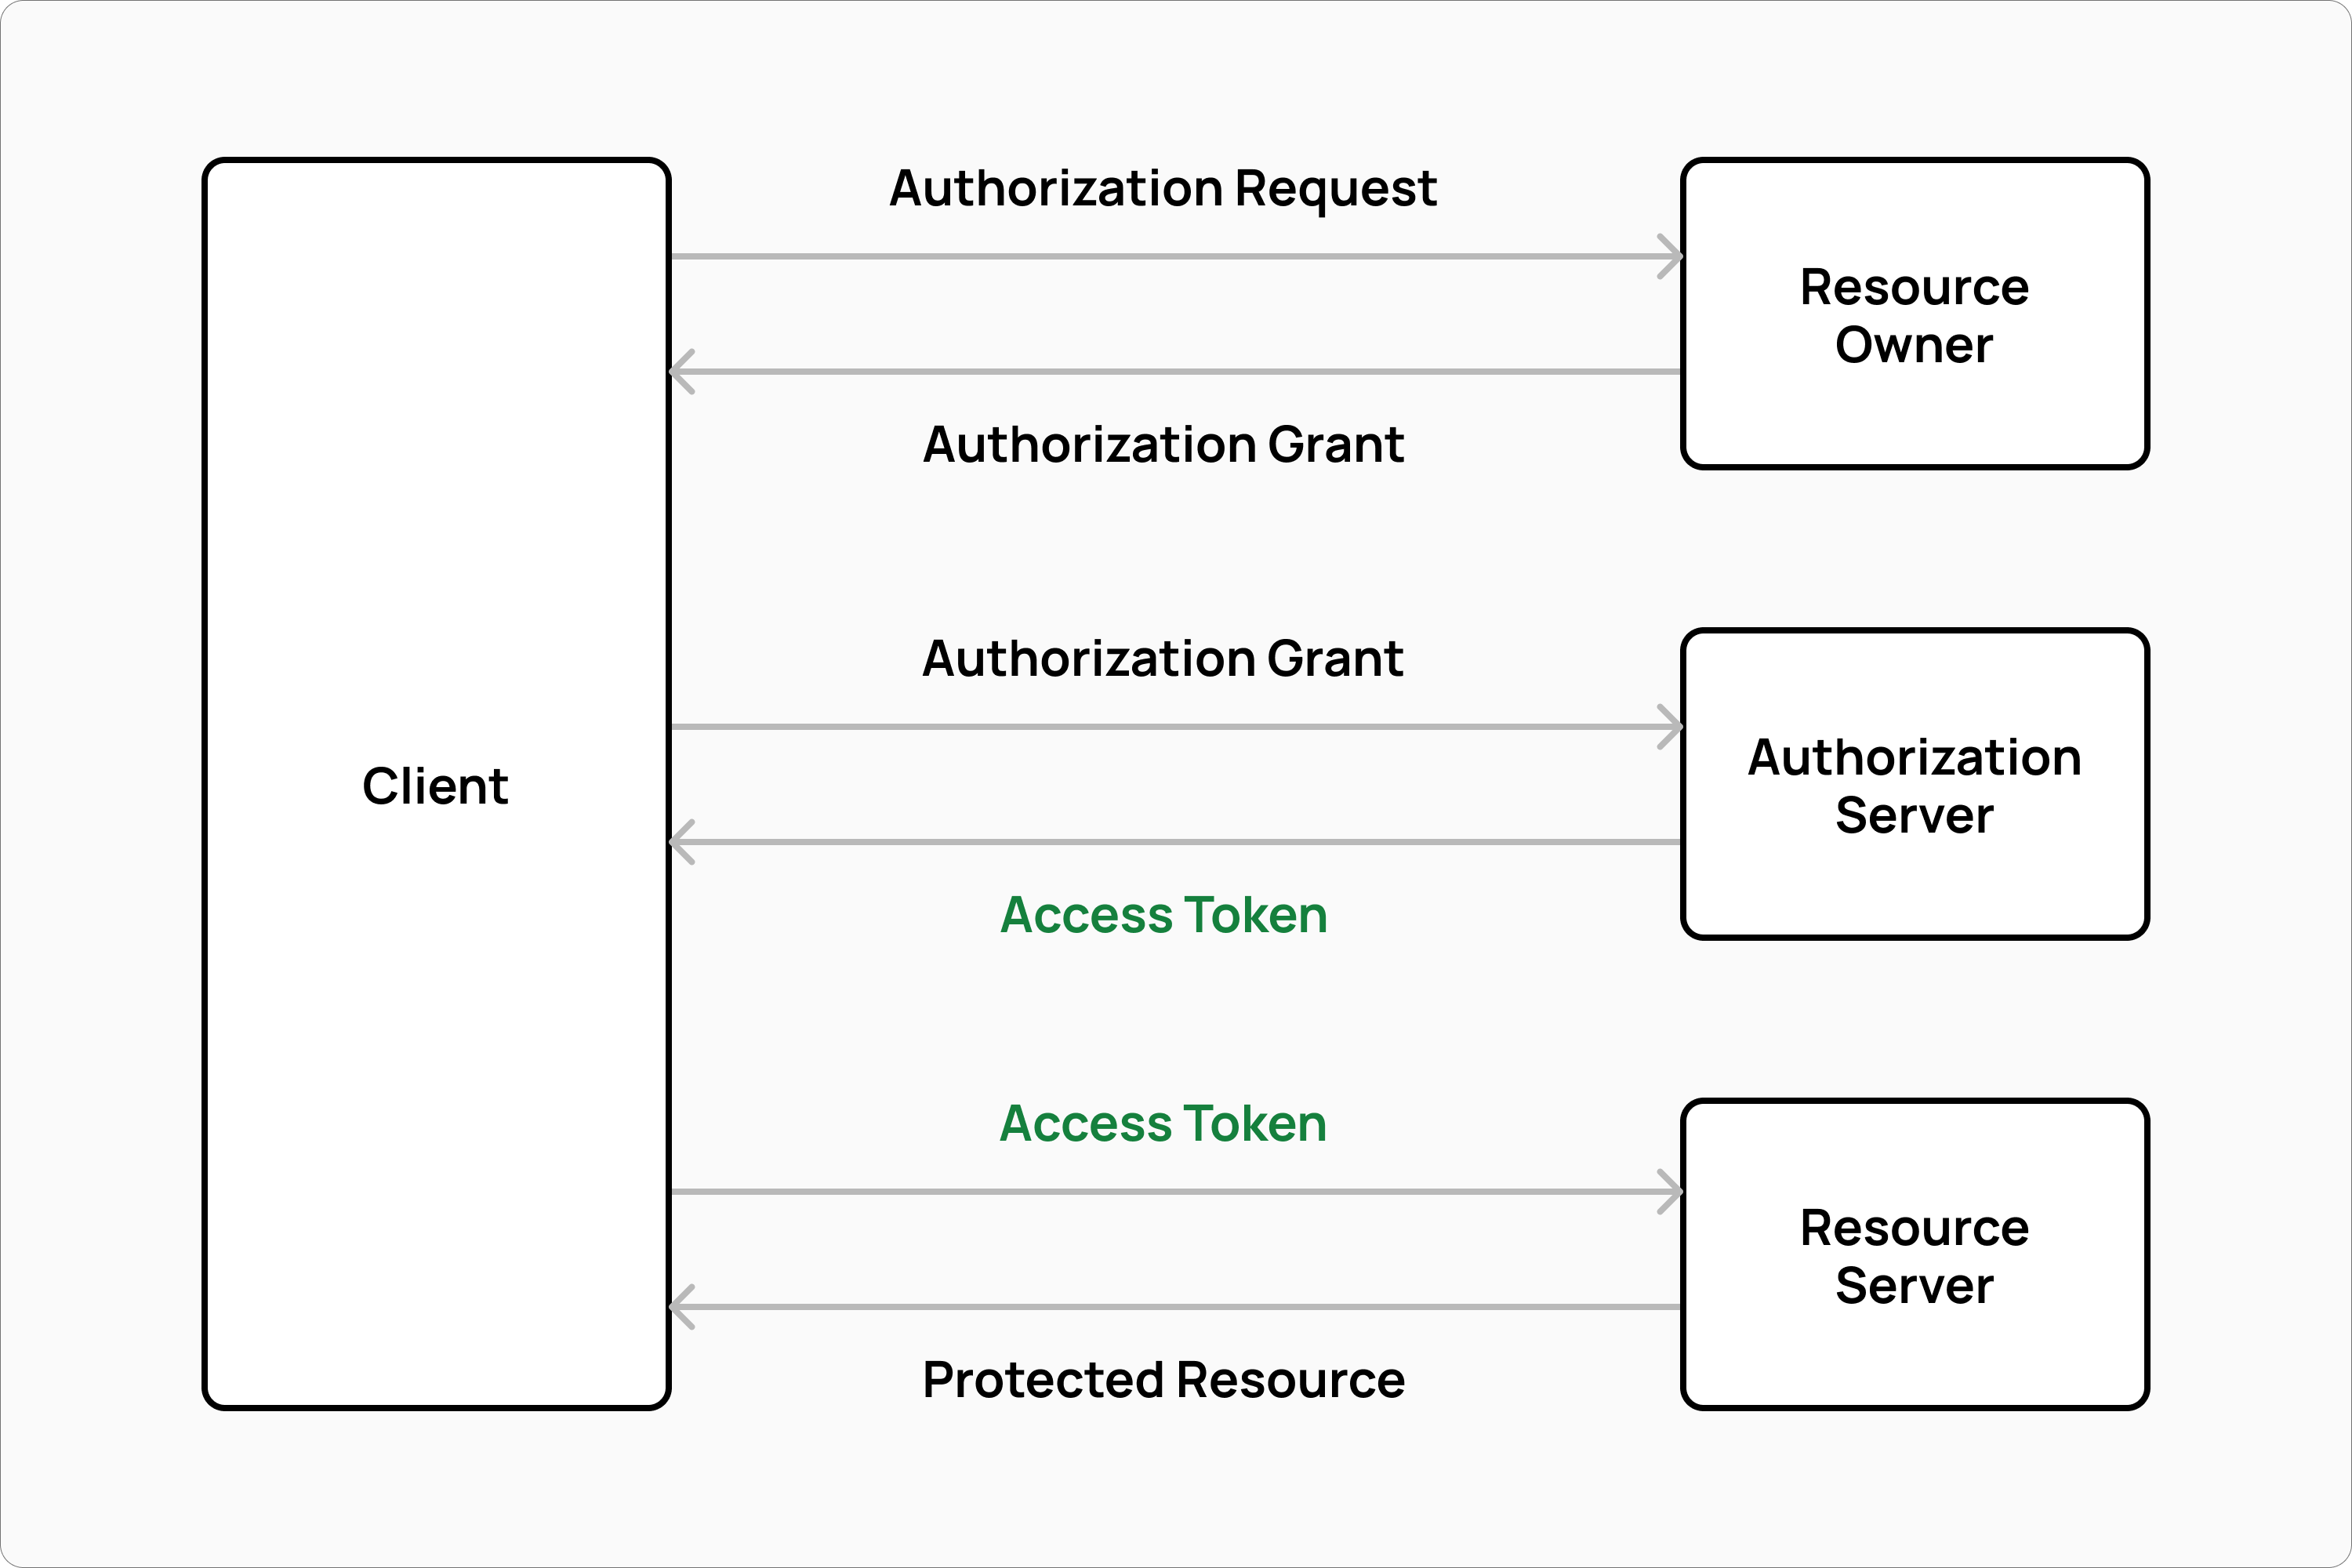
In designing the Commerce Layer API, my co-founder Massimo and I had to decide how to secure all API calls. For us, the OAuth2 Authorization Framework was the obvious choice. OAuth2 supports multiple authorization flows depending on the use case. In the client credentials flow, for example, a client (such as a sales channel) obtains an access token from an authorization server and uses the token as the key to authenticate with a resource server.
Other authorization flows may also involve a resource owner. A customer, for example, can be the resource owner of their orders, credit cards on file, address book, active subscriptions, etc. Hence, the customer must grant access to the protected resources using a password flow before the authorization server will issue an access token to the client.
As a method of passing the access token to the resource server, we opted to use the Bearer Token specification, which requires the access token to be sent in the HTTP Authorization header as follows:
Authorization: Bearer <token>
OAuth2 doesn't define the format of access tokens. This can be anything, like a unique string of characters. All that is required is that the authorization server and the resource server coordinate on access token formats. As for the implementation, it is left up to the developer.
Despite the fact that a random token would have worked perfectly well for our use case, Massimo and I decided to research possible alternatives before deciding on the access token format for our API. It's here that we discovered the JSON Web Token standard, which is a compact, elegant, and self-contained way to securely transmit data between parties.
Introducing JWTs
A JSON Web Token consists of three parts separated by dots. Below is an example of what it looks like:
eyJhbGciOiJIUzI1NiIsInR5cCI6IkpXVCJ9.eyJjdXN0b21lciI6IjEyMzQ1Njc4OTAiLCJtYXJrZXQiOiJFVSIsInZpcCI6ZmFsc2V9.AI0tk5_TPQQYY5bcBV-uUvI3kmXD5rkJ02GAyBfFqyE
The first part of the token is the header, a Base64 representation of a JSON object that contains the type of token, which is JWT, and the signing algorithm used, such as HMAC SHA256 or RSA. Below is the header of our JWT example:
{
  "alg": "HS256",
  "typ": "JWT"
}
The second part is the JWT payload, a Base64 representation of a JSON object that can contain any data. The information you send to the resource server will be stored here. Typically, it will be a customer identifier and other data:
{
  "customer": "1234567890",
  "market": "EU",
  "vip": false
}
The last part is the signature, which is calculated as follows:
HMACSHA256(
  base64UrlEncode(header) + "." +
  base64UrlEncode(payload),
  shared-secret-key
)
By using a shared secret key, the client signs the JWT header and payload. using the signature, the resource server can verify the message was not changed along the way. When tokens are signed with a private key, the signature is also used to verify the sender's identity.
In essence, the resource server can trust the JWT content by verifying the signature. With this method, any client with a secret can generate a trusted JWT and send any information to the resource server. Unsigned or modified tokens will be rejected by the resource server. However, anyone can decode JWT content even without the secret, so be careful not to include any sensitive information in the payload. Use this tool to play around with different headers, payloads, and signatures if you want to test it out.
Benefits of using JWTs
As opposed to being just a random string, a JWT can bring information trusted by the resource server. API performance as well as interoperability with other systems can benefit from such a distributed information.
Performance-wise, the JWT payload can be thought of as a client-side cache that avoids unneeded database queries. The token can, for instance, include market data and customer information without the need to retrieve this data from your database every time an API request is made. This might only save you a couple of simple queries, but repeated for every single API call it can significantly improve your API response time.
Just like any other caching mechanism, JWTs can have have a time to live (TTL) and their payload will be trusted by the resource server until their expiration date. The longer the TTL, the higher the cache hit rate, but the longer the duration of any stale data. Keep in mind that as a distributed system, it can be difficult to invalidate a token that brings stale data, since the resource server will always trust the token until it expires. In order to invalidate a token before its expiration, you have to rotate the secret so that any JWT signed with outdated keys becomes invalid immediately.
Implementing Single-Sign On
JWTs can be used to develop Single-Sign On (SSO) solutions with any identity provider. After authenticating a customer with the identity provider, you can generate a JWT that includes the customer's information in the payload, sign it with a shared secret or RSA private key, and make API calls on behalf of the customer. If you want to see it in action, the following tutorial shows how to integrate Auth0 with Commerce Layer in a Next.js application.
SSO using JWTs also allows you to centralize the authorization server and design stateless ecommerce stacks using independent microservices, since the token payload can be used to securely transmit any data without sharing any session. As a result, your architecture becomes more scalable and more in line with the MACH principles.